When you get a flat tire, changing it safely is easier than you might think. First, pull over to a flat, secure spot away from traffic and turn on your hazard lights. Set the parking brake and chock (block) the opposite wheel for safety. Next, loosen the lug nuts on the flat tire before jacking up the car. Place the jack at the manufacturer‑recommended point and lift the car until the flat tire is off the ground. Unscrew the lug nuts completely and pull off the old tire. Then mount the spare: align it on the wheel studs, hand-tighten the lug nuts, lower the car partly, and fully tighten the nuts in a crisscross pattern. Finally, check the spare’s air pressure and drive cautiously to a shop for a permanent repair.
Safety First: Stop in a Safe Spot
Before you do anything, stop the car in a flat, stable area well off the road. Activate your hazard lights so other drivers know you’re there. Turn on the parking brake to keep the car still, and if you have wheel chocks or even large rocks/wood blocks, place them behind or in front of a wheel diagonally opposite the flat tire. Always follow your owner’s manual to find the exact jacking point (usually a reinforced frame spot near the wheel) and recommended procedure. Having a flashlight and reflective triangles handy can improve safety, especially at night.
Gather Your Tools
Make sure you have everything you need before you start. At minimum, you’ll need the spare tire, a jack, and a lug wrench (also called a tire iron). Gloves or a towel can protect your hands, and a tire pressure gauge is good to have so you can check the spare later. It’s also smart to know where your spare lives – in many cars it’s under the trunk floor or mounted below the rear bumper. If you have a wheel cover or hubcap, pop it off with the screwdriver end of your lug wrench or a flat screwdriver before touching the lug nuts.
Loosen Lug Nuts (But Don’t Remove Yet)
With the car still on the ground, use the lug wrench to loosen each lug nut about a quarter-turn counterclockwise. This is easier to do while the tire is snug on the ground so it won’t spin. If a nut is very tight, position the wrench so it’s horizontal and press down with your foot or use your body weight for extra leverage. Remember: loosen the nuts now but leave them threaded on a few turns – you’ll fully remove them after jacking up the car.
Jack Up the Car
Place the jack under the car at the correct lifting point (check your manual or look for a reinforced notch). Make sure the jack is on solid, level ground; if the ground is soft (dirt, gravel, or grass), slip a piece of wood or a flat stone under the jack foot to prevent it sinking. Slowly pump or crank the jack to raise the car until the flat tire is about 6 inches off the ground. Never put any part of your body under the car while it is lifted. Once the car is raised, you should be able to spin the loose lug nuts off by hand.
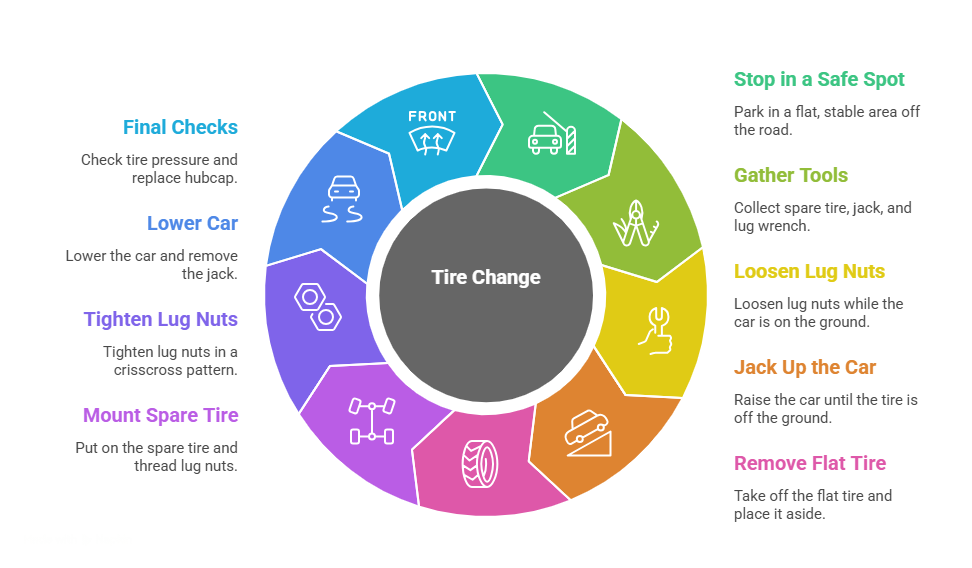
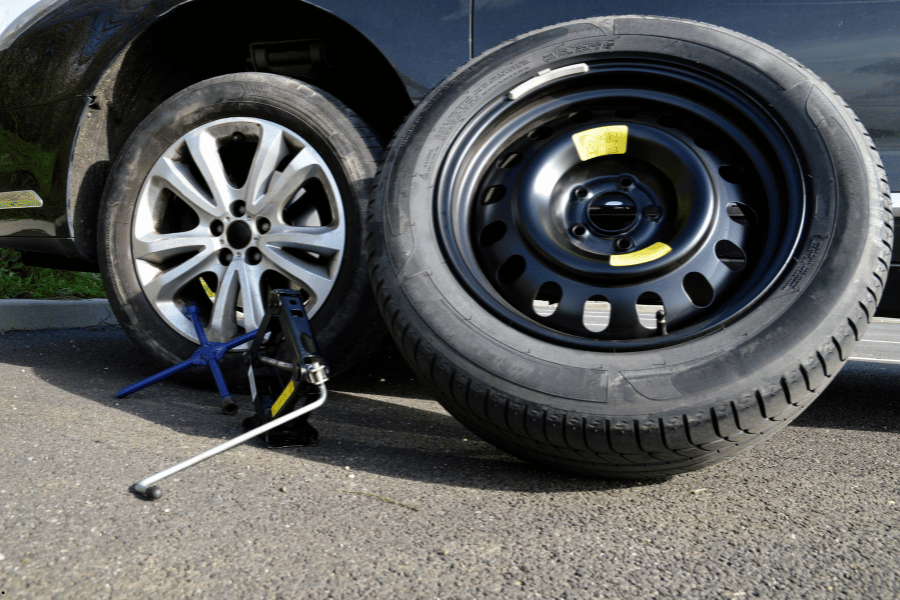
Remove the Flat Tire and Mount the Spare
Finish unscrewing the lug nuts and set them safely aside. Pull the flat tire straight off the wheel hub. It can be heavy, so grip it firmly and place it on the ground lying flat (so it won’t roll). Now take your spare tire and line it up with the wheel studs. Push the spare onto the studs as far as it will go. Thread the lug nuts back on by hand; start them as far as they’ll go to hold the spare in place.
Tighten the Lug Nuts, Lower the Car, and Final Checks
With the spare on, hand‑tighten the lug nuts in a crisscross (diagonal) pattern. This means tighten one nut, then the one directly across from it, and so on. This evens out the pressure. Next, slowly lower the jack so the spare tire is on the ground (though not fully bearing the car’s weight). Use the lug wrench to fully tighten the lug nuts in the same star pattern, pushing down on the wrench for leverage. Lower the car completely and remove the jack. Give all the lug nuts one more firm turn with the wrench to make sure they’re snug.
Finally, replace the hubcap or wheel cover if it fits the spare, and clean up your tools. Check the spare tire’s pressure with a gauge: it should match the recommended PSI (often printed on the tire or in your door jamb). If it’s low, inflate it before driving. Remember that many spares, especially “donut” spares, are temporary: drive cautiously and don’t exceed the speed or distance limits (often about 50 mph or 50–70 miles) printed on the tire.
After Changing the Tire
Once you’re safely back on the road, head to a tire shop as soon as possible. Have a professional inspect your flat tire and either repair it or install a new tire so you can replace the spare. Modern spare tires are only meant for emergencies and might differ in size or performance, so they’re not for long-term use.
Changing a tire can feel stressful, but with practice and the right steps, it’s very doable. Always remember: safety first – stay off traffic, use your hazard lights and parking brake, and follow the owner’s manual. Taking these precautions and following the step-by-step process will get you safely back on the road.